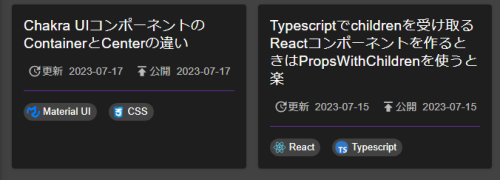
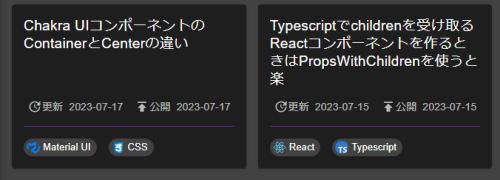
下のようなページ情報を表示するカード型のリンクをMaterial UIで作っていく。
タグをクリックすると指定されたページへ移動できるようにする。
カードの下部に表示するタグの表示名と画像を用意しておく。
import reactImg from './react.svg';import muiImg from './mui.svg';export const tagMap = { 'react': { label: 'React', image: reactImg }, 'mui': { label: 'Material UI', image: muiImg }, ...};
このtagMapのキーからタグの型を作成する。
export type TagNamesType = keyof typeof tagMap;
Tagコンポーネントを作成する。
import Link from "next/link";import { StackProps, Stack, Chip, Avatar } from "@mui/material";export const Tag = (props: { tagName: TagNamesType; }) => { const { label, image } = tagMap[props.tagName]; return ( <Chip clickable component={Link} size='small' href={`/${props.tagName}`} label={label} avatar={<Avatar src={image.src} alt={props.tagName} />} /> );};
たとえば、<Tag tagName='mui'>としてタグを生成しら表示名はMaterial UIとなり、
それをクリックするとhtttp://financial.programmer.net/muiへ移動することとなる。
Tagを横並びで表示するTagsコンポーネント。表示できる幅が足りなければ折り返すようにしている。
export function Tags({ tagNames, ...props }: { tagNames: TagNamesType[]; }) { return ( <Stack direction='row' useFlexGap gap={2} flexWrap='wrap' {...props}> {tagNames.map((tagName) => <Tag key={tagName} tagName={tagName} />)} </Stack> );};
更新日時を表示するためのBlogDateTimeコンポーネントを作る。
import { Publish, Update } from "@mui/icons-material";import { Stack, StackProps, Typography } from "@mui/material";function BlogDateTime(props : { date: string; type: 'published' | 'modified';}) { const values = props.type === 'published' ? { label: '公開', icon: PublishIcon, itemProp: 'datepublished' } : { label: '更新', icon: UpdateIcon, itemProp: 'datemodified' }; return ( <Typography component={Stack} variant="body2" direction="row" spacing={1} > <values.icon fontSize="small" /> {values.label} <time dateTime={props.date} itemProp={values.itemProp} >{props.date}</time> </Typography> );};
BlogDateTimeを横並びで配置するためのBlogDateTimesコンポーネント。
export type BlogDateTimesPropsType = { datemodified: string; datepublished: string;}export function BlogDateTimes(props: BlogDateTimesPropsType ) { return ( <Stack direction="row" spacing={2} justifyContent='flex-end' flexWrap="wrap" > <BlogDateTime date={props.datemodified} type="modified" /> <BlogDateTime date={props.datepublished} type="published" /> </Stack> );};
これまで作成したコンポーネントを組み合わせてBlogCardコンポーネントを作る。
export function BlogCard(props:BlogDateTimesPropsType&{ title: string; tagNames: TagNamesType[]; path: string;}) { return ( <Card sx={{ display: 'flex', flexDirection: 'column' }} > <CardActionArea component={Link} href={`/${props.path}`} sx={{ padding: 2, flexGrow: 1, display: 'flex', flexDirection: 'column' }} > <Typography variant="h4" component="div" flexGrow={1}> {props.title} </Typography> <BlogDateTime datemodified={props.datemodified} datepublished={props.datepublished} /> </CardActionArea> <Divider variant='middle' sx={{ backgroundColor: 'primary.main' }} /> <Tags tagNames={props.tagNames} /> </Card> );};
Cardをflexとしているのは、もしflex出ない場合、タイトルの文字数が少ないカードは高さが足りなくなり下部の要素が不揃いとなってしまうため。

そこでflex化してCardActionAreaにflexGrow={1}をつけることで伸長させるようにする。

BlogCardを次のように生成すれば一番上のようなカードとなる。
<BlogCard title='Material UIでページ情報を表示するカード型のリンクを作成する' tagNames={['mui', 'react']} datepublished='2023-10-22' datemodified='2023-10-23' path='/mui-blogcard'/>
gridを使ってカードを一覧表示する方法はこちらのページで。
Material UIで自動で列を調整してくれるグリッドレイアウトを作り、ページ一覧を表示する